


AccountEdge Network Edition Information
Table of Contents
NOTES:
-
If one or more workstations running macOS 15 are unable to see the company file when clicking on ‘Browse’, try the steps below on the affected workstation :.
-
To check your settings go to System Settings>Privacy & Security>Local Network and turn the AccountEdge NE and FileConnectBrowser sliders on.

-
To check your settings go to System Settings>Privacy & Security>Local Network and turn the AccountEdge NE and FileConnectBrowser sliders on.
- FileConnect does not require an AccountEdge user license.
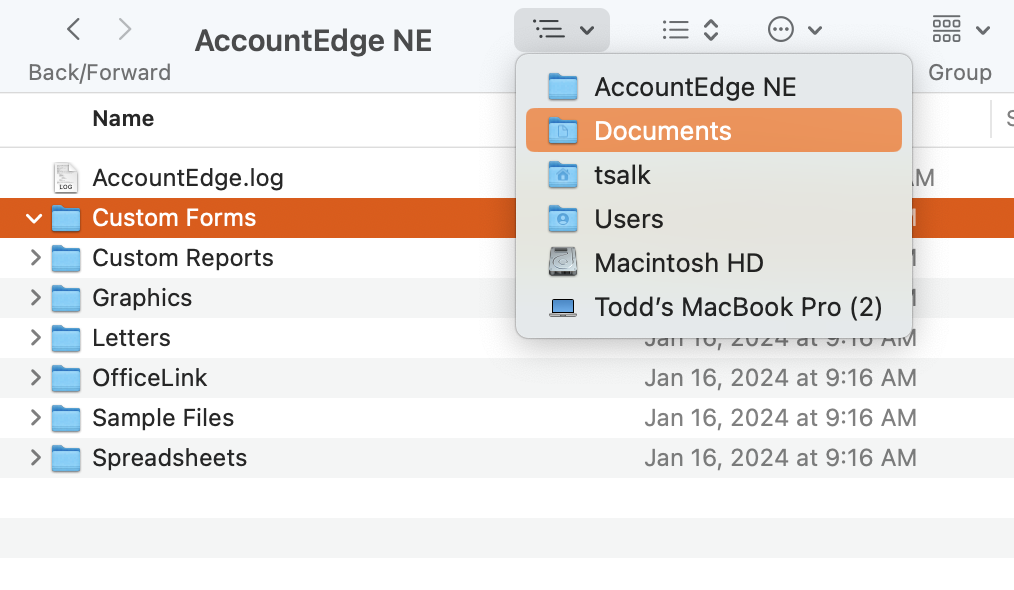
- Custom Forms cannot be shared by users. Each user needs to have the custom forms folder located on their “C” drive here: Documents>AccountEdge NE>Custom Forms.
AccountEdge Network Edition System Requirements
Click here to get the current system requirements for the latest version of AccountEdge Network Edition. For better performance, we suggest the following specifications for the host computer:
- Client RAM: 8 GB RAM; 16 GB recommended
- 1000BaseT/Gigabit Ethernet Network
- Solid State Drive (SSD) for faster read/write speeds
Installation
AccountEdge Network Edition is delivered as a DMG (macOS) or an installer .exe (windows).
On macOS, double-click the DMG and drag AccountEdge Network Edition to the Applications folder. Next, double-click AccountEdge Network Edition to run through its installation. The installation will take a few minutes. For more information see our installation video.
On Windows, double-click the .exe and run through the installation. Unless you have some very unique installation requirements, you'll select the default options in each step of the installation.
AccountEdge Network Edition includes a sample company file, named Widgets. You can explore the capabilities and features of AccountEdge Network Edition, as well as learn its usage, because this file already has customers, vendors, employees, invoices, purchase orders, inventory items, payroll, received payments, and cash disbursements. To open and log into the sample company file, select Sample Company at the AccountEdge Network Edition Welcome window, and log into the file using the User ID of Administrator with no password (just click OK).
AccountEdge Network Edition will run unregistered for 30 days from the date of installation. Any time during that period, you can register your software, by selecting Registration from the Help menu or by selecting the registration link at the top of the welcome window. If your software remains unregistered after the 30-day trial period, it will become inactive. Any data you've entered will be preserved and can be accessed after you register your software.
AccountEdge Network Edition uses FileConnect to share the data of a company file with all AccountEdge Network Edition users. To enable this, FileConnect will need to be installed and started on a host machine. For details, review the FileConnect section of this document.
Definitions
Bonjour: A Network protocol that facilitates the identification of computers on a local area network, without user intervention.
Company file: A single file containing all the transactions and related data for a single entity.
Databases folder: The folder on a host machine where company files are located. The complete path is:
- macOS: Macintosh HD > Library > Application Support > Accountedge NE > Databases
- Windows: C > Program Data > AccountEdge NE > Databases
Document Attachments folder: The folder on a host machine where attached documents are located. The complete path is:
- macOS: Macintosh HD > Library > Application Support > Accountedge NE > AccountEdge Documents
- Windows: C > Program Data > AccountEdge NE > Accountedge Documents
FileConnect: The AccountEdge Network Edition utility that enables the sharing of company file data to all AccountEdge Network Edition users on a local area network.
Graphics folder: The folder on a host machine where image files are stored. These images are referenced from company files. The complete path is:
- macOS: Macintosh HD > Library > Application Support > Accountedge NE > Graphics
- Windows: C > Program Data > AccountEdge NE > Graphics
Host: A computer in a local area network where company files are stored, and makes the data of the files available to AccountEdge Network Edition users on the network.
Lock files: Additional files used by AccountEdge Network Edition to track company file access. Lock files have names starting with Access and Lock, and an extension of .flk. These files record among other things, which users have a company file open. They are created when a company file is opened and removed when users have no company files open.
Machine ID: A unique computer identification method, generated from the operating system.
Multi-user: A mode of operation where several users can open a single company file, and simultaneously record (create and update) transactions.
Optimizer: An AccountEdge Network Edition utility used to optimize a company file. Optimization compacts the data in a company file and reindexes the database for efficiency.
Sample company: A company file containing sample data of customers, vendors, employees, jobs, inventory items, invoices, purchases, loans, received payments, and disbursements. You can use this file to explore the capabilities of AccountEdge Network Edition: enter, update, and delete transactions, card file entries, and item records, while not impacting the data in your own company file.
Serial number: A unique identification number used to register your AccountEdge Network Edition software.
Single-user: A mode of operation where only one user can open a single company file, excluding access to all other users.
Verify: An AccountEdge Network Edition utility used to verify the database integrity.
Widgets: See sample company.
Overview
AccountEdge Network Edition provides multiple, simultaneous access to company files, for users on workstations located on a Local Area Network (LAN), within a single office environment. This AccountEdge Network Edition capability is facilitated uses its file manager utility, FileConnect, which is installed with AccountEdge Network Edition. FileConnect manages data input and output between the company file and workstations, so users are able to simultaneously enter, update and delete transactions. Users on the different workstations do not access a company file directly, all transactions are managed by FileConnect on behalf of users. A company file that is to be shared is placed in a specific location on the hard drive of a host machine, and the FileConnect utility on that host would make data available from the company file, to the workstations1. Therefore, FileConnect needs to run only on a host machine that has a company file to be shared (it's said to be hosting a file). In a given site, there could be more than one host, each hosting different company files, but the most common scenario is to have one host machine, hosting one or more, company file(s).
The data format of company files are platform-independent. That is, a company file can be used with AccountEdge Network Edition, AccountEdge Pro, and AccountEdge Pro for Windows. Because AccountEdge Network Edition uses FileConnect for data transfers, the data of a company file cannot be shared with AccountEdge Pro and AccountEdge Pro for Windows users, while AccountEdge Network Edition users are accessing the file. Additionally, since FileConnect is being used, the company file must be placed in a specific location on the hard drive of the host machine1.
Remote Access
AccountEdge Network Edition is designed to work on a LAN within a single office environment. Although it may be possible to remotely access company files, outside of a LAN within an office, this scenario is not recommended or supported.
AccountEdge Hosted cloud desktop works just like a physical desktop but is hosted in the cloud. Your company file is stored on a secure cloud desktop server so that users from any location can access your AccountEdge company file and collaborate in the accounting process. If you are interested see our AccountEdge Hosted page.
FileConnect
Because AccountEdge Network Edition does not know which machine in a site will be the host machine, FileConnect does not start automatically after installation. You'll have to start FileConnect on the machine that will be serving as a host. Thereafter, FileConnect will start when the machine is restarted. Before starting FileConnect on the host machine, you should verify the machine is on the local area network (LAN). If the machine is using more than one network service (e.g., an ethernet service and a wireless AirPort service), verify the service order is correct for your environment. FileConnect will use the first service in the list indicated in the Network area of your System Preferences.*
By default, FileConnect will dynamically allocate a port number in the range of 49152 through 65535, to use for network communications. If you need or want to use a specific port number, you can indicate this when you start FileConnect. One reason to indicate a specific port number would be to allow communication through a firewall. If the firewall allowed communications through specific ports and refused connections on all other ports, you would need to set a FileConnect port number that the firewall allows.
AccountEdge Network Edition and FileConnect can use the Mac network service called Bonjour. This would allow for easy identification of hosts on the network. You can also use IP addresses to locate hosts on your network, although the need for this is very specific. The typical scenario would be to use Bonjour and dynamic port numbers.
To start FileConnect:
- Open System Preferences by clicking the little apple in the upper left-hand corner of your screen, and scrolling to System Preferences
- Click the AccountEdge Network Edition icon
- Click the Port Number tab to indicate a specific port number if necessary
- Click the Start/Stop tab, and click Start FileConnect if it isn't already running
- Enter the Mac Administrator name and password if requested
When FileConnect is running, you'll see a sentence indicating that, and the window will show your host name and IP Address. You can close the System Preferences.
To Stop FileConnect:
- Open System Preferences
- Click the AccountEdge Network Edition icon
- Click the Stop FileConnect button
Working With Company Files
In AccountEdge Network Edition, all transactions of a single company are stored in a company file. All sales, purchases, disbursements, receipts, inventory and payroll information, all transactions, are stored in a company file. You could have more than one company file, and each file would contain the transactions of a different, single company. You can create a company file from any workstation that has AccountEdge Network Edition installed and has access to a host machine. When a company file is created, it is placed in a specific folder on the host machine1. The contents of a Company File will be available through the host machine's FileConnect utility.
If your host machine isn't listed when you look under the Bonjour tab of the Company File Browser, and isn't available using its IP Address, it's possible FileConnect isn't running on the host machine. Verify FileConnect is running on the host machine; start FileConnect if necessary. This is done in the Mac's System Preferences on the host machine.
Create a New Company File
The New Company file assistant simplifies the process of creating a company file. If you need additional information about each step as you proceed through the Assistant, click the Help button at the bottom of any window.
- Launch AccountEdge Network Edition
- Select Create Company File from the Company File Maintenance menu in the lower right-hand corner of the Welcome window
- Follow the on-screen instructions until you reach the Create your company file window
- In the Create your company file window, click Browse
-
Select the host machine
- To identify the host machine using Bonjour, click the Bonjour tab, and select the host machine
- To identify the host machine using the IP address, click IP Address tab, and enter the IP address and port number of the host machine
- Enter a name for your company file in the Save As field, then click Save
- Click Next, and your company file will be saved on the host machine
- If you want to continue setting up your company file, you can use the Easy Setup Assistant to help you through the main company file setup tasks
- If you want to set up your company file later, close the Easy Setup Assistant
Open a Company File
AccountEdge Network Edition remembers the name of the last file opened. If the file had been previously opened, you can click the Open button in the AccountEdge Welcome window. Otherwise,
To open a company file by browsing for it:
- Launch AccountEdge Network Edition
- Click the Browse button in the Welcome window to open the Company File Browser
- Select either Bonjour or IP Address to locate the host machine
- Select the host machine
- Select the company file you want to open and click Open
Company File Maintenance
To help ensure the integrity of your financial information, you should perform regular maintenance: backing up, verifying, and optimizing, your company file.
Perform maintenance tasks on the host machine: For efficiency, the maintenance tasks should be performed on the host machine
Perform maintenance tasks in single-user mode: You'll need to prevent other users from making changes to the file while performing the maintenance tasks. Opening the file in single-user mode will prevent other users from opening the file. This option is selected on the login window, as you log into the file
Backing Up Company Files
To back up a company file
-
Launch AccountEdge Network Edition and open the company file in single-user mode
- You cannot open the file in single-user mode if other users have the file open; if you cannot open the file in single-user mode, verify all other users are logged out of the file
- Select File > Backup
-
Choose the type of backup
- You can elect to backup just the company file, or the company file and all custom templates, reports, spreadsheets and graphics
- If you're using the host machine to back up your files, custom templates, reports, spreadsheets and graphics stored on the workstations will not be included in the backup. You will need to back up these items separately on your workstations
-
Choose whether or not to check your company file for errors
- If you check for errors, AccountEdge Network Edition will run the Verify utility, which will check for company file integrity
- If an error is detected, you will not be able to backup the company file, and the cause of the error will need to be determined
-
Select a location option for your backup:
- Selecting To a Disk will allow you to save the backup file to your local disk, to a different hard disk, or to other media
- To Dropbox will allow you to save your backup to your Dropbox account
- Apple replaced their MobileMe service with iCloud. iCloud is not a general purpose cloud location for the storage of backup files. As a result, iCloud does not support the storage of AccountEdge backup files
- Click Continue
-
If you selected the Check Company File for errors option, the verification process may take several minutes. The Verification process will check your company file for data integrity. If the Verification process fails, that is, there is a problem with the company file, the backup process will terminate. The problem with the company file must be resolved.
- When the verification process finishes, click OK in the window that appears. This window appears whether or not errors were found in the company file
-
Indicate backup file name and location
- The default backup file name will be Backup mm-dd-yy filename.zip2
- You can change this name when you backup to disk
- When you backup to Dropbox, the backup file will be saved in the AccountEdge/Backups/ folder of your Dropbox account
- If the Save button is not active for you to click, the name of the backup file is too long; it needs to be shortened
- By default, AccountEdge Network Edition will truncate the file name if it is too long, when saving to Dropbox
Restoring Company Files from Backups
Restoring from a backup requires access to the backup file. If the backup file is located on the host machine, the restore operation must be performed on the host machine. If the backup file is located on another machine in the LAN, the restore operation must be performed on that machine. In either case, the host machine, where you will restore the file to, will be available during the restore operation.
To restore a company file from a backup
-
Select the Restore function
- If you have a company file open, select File > Restore and indicate where the backup is (i.e., Disk, Dropbox)
- If you are at the AccountEdge Network Edition Welcome window, select Restore from the Company File Maintenance menu in the lower right-hand corner of the window
- Navigate to the folder where the backup is saved
- Select the backup file, and click Open
- In the Restore Company File Browser, indicate the name of the file you are about to restore, and select the host where the file should be located
- Click Save. You will have just restored a company file from its backup. Once AccountEdge Network Edition completes the restore operation, it will present the login window, so you can immediately log into the restored file
Restoring Custom Forms from Backups
To restore your custom forms, letters, reports and spreadsheets, the backup file needs to be located on the machine where the restore process is to be performed. That means the backup file may have to be copied to this machine. With the backup file accessible
- Launch AccountEdge Network Edition
- Open your company file, or open the Sample Company file
- When the file is open, click the Company Data Auditor button, which is located under the Accounts tab
- In the Company File Overview window, click the magnifying glass button to the right of Custom Forms, etc
- Move the opened Finder window to one side of your screen
- Click New Finder Window from the File menu at the top of the screen
- In this window, navigate to the folder where the backup file resides
- Double-click on the backup file; a folder will be extracted from the archive
- Double-click to open the folder
- Depending on your needs, you can move the Custom Forms, Custom Reports, Letters, and Spreadsheets folders from this window to the first window you opened, or selectively copy the contents of these folders, to the same-named folders in the first window you opened
- When complete, you can remove the folder you extracted from the archive (the folder created by double-clicking the backup file)
The Graphics folder and its contents must be restored on the machine hosting the company file that references those graphic files. To restore the Graphics folder on the machine hosting a company file
- Open a Finder window, and navigate to the folder where the backup file resides
- Double-click on the backup file; a folder will be extracted from the archive
- Double-click to open the folder
- Depending on your needs move the Graphics folder to Macintosh HD/Library/Application Support/AccountEdge NE/, or selectively move contents of the Graphics folder to Macintosh HD/Library/Application Support/AccountEdge NE/Graphics
- When complete, you can remove the folder you extracted from the archive (the folder created by double-clicking the backup file)
Verifying a Company File
Data verification is the process of checking a company file for errors. Verification can catch minor problems in the file before they cause serious problems. You can verify your company file at any time. For efficiency, this should be done on the host machine, but can be done from any workstation. This process should be done in single-user mode.
Verify a company file
-
Launch AccountEdge Network Edition and open the company file in single-user mode
- You cannot open the file in single-user mode if other users have the file open; if you cannot open the file in single-user mode, verify all other users are logged out of the file
- Select File > Verify Company File
- Click OK verifying with want to run the process
When the file verification process is complete, a message appears describing the results of the process
- If no errors were found, click OK to end the verification process
-
If your company file is corrupt, you can
- Attempt to fix the company file by optimizing it—see Optimizing Company Files, then repeat from step 1 above to check if the error has been fixed
- Restore the company file from your most recent backup—see Restoring Company Files from Backups
Optimizing Company Files
As you enter and remove transactions, and display information about transactions, your company file will have unused areas that once contained transaction information. These unused areas can affect the efficiency of your company file and take up space on your hard disk. You can use the Optimization Assistant to remove the unused areas in the company file and keep your software running efficiently.
You must be on the host machine to Optimize your company file. This process should be done in single-user mode.
To Optimize a Company File
-
Launch AccountEdge Network Edition and open the company file in single-user mode
- You cannot open the file in single-user mode if other users have the file open; if you cannot open the file in single-user mode, verify all other users are logged out of the file
- Select File > Optimize Company File, and click OK to continue
- In the Optimization Assistant window, click Continue
-
Navigate to the Databases folder
- In pre-10.7 Macs, click on Macintosh HD > Library > Application Support > AccountEdge NE > Databases
- In 10.7 and newer Macs, select column view, and slide left to expose the folders on the left; select Library > Application Support > AcountEdge NE > Databases
- Select the file and click Open
The Optimization process will Optimize your company file, which has a .myo extension. The Optimization Assistant will also create a copy of your unoptimized company file, giving it an extension of .bak. The .bak copy can be deleted when you've verified your company file is OK. Click Continue to Optimize another file, Close otherwise.
Upgrading Files From Older Versions
Company files used in previous versions of AccountEdge will need to be upgraded before you can use them in the latest version of AccountEdge Network Edition. Files need to be upgraded on the machine where the file resides (the host machine). To upgrade a company file
- Launch AccountEdge Network Edition
- Select Upgrade company file from the Company File Maintenance menu in the lower right-hand corner of the window
- In the Upgrade Assistant window, click Find File
-
Navigate to the folder where the company file resides. If the old file resides in the Databases folder
- In pre-10.7 Macs, click on Macintosh HD > Library > Application Support > AccountEdge NE > Databases
- In 10.7 and newer Macs, select column view, and slide left to expose the folders on the left; select Library > Application Support > AcountEdge NE > Databases
- Click on the file to upgrade
- Click the Open button
- In the Upgrade Assistant window, click the Save As button
-
Navigate to the Databases folder
- In pre-10.7 Macs, click on Macintosh HD > Library > Application Support > AccountEdge NE > Databases
- In 10.7 and newer Macs, select column view, and slide left to expose the folders on the left; select Library > Application Support > AcountEdge NE > Databases
- Indicate the name of the upgraded company file (cannot be the same name as the original file)
- Click the Save button
- In the Upgrade Assistant window, click the Next button
- Confirm your selections; click the Next button
- Click Finish in the Upgrade Assistant, Congratulations window
- Your file is upgraded, you can use Browse from the AccountEdge Network Edition window to open your company file
Upgrading From AccountEdge Pro to Network Edition
Company files used in AccountEdge Pro are completely compatible with AccountEdge Network Edition. When using AccountEdge Network Edition, the company file must reside in a specific folder on the host machine. If you are upgrading from AccountEdge Pro to AccountEdge Network Edition, you will need to move your company file to this location.
Attaching Documents
You can attach documents to cards in the Card File, Invoices, and Purchase Orders. When documents are attached they can be copied to an AccountEdge Documents folder in order to make them available to all users of AccountEdge Network Edition. The complete path of the AccountEdge Documents folder is: Macintosh HD/Library/Application Support/AccountEdge NE/AccountEdge Documents on the host machine.
You can also link documents to cards in the Card File, Invoices, and Purchase Orders, which means the documents will not be copied to the AccountEdge Documents folder. Instead AccountEdge will just record a link to the file, regardless of where it is located on the hard drive. When you use this method, users on other workstations may not be able to access the documents.
The AccountEdge Documents folder and its contents are not saved as part of an AccountEdge Backup. If you wish to create backups of this folder, you will need to do so separately.
Notes
- The hard drive location on the host machine, where the company files are located is: Macintosh HD/Library/Application Support/AccountEdge NE/Databases
-
Backup mm-dd-yyyy filename.zip
- mm-dd-yyyy is the date from your machine's clock
- filename is your company file name
- .zip is the file extension and cannot be changed.
* Wireless networks are acceptable; ethernet-based (wired) networks are preferred. New Macbook Pro laptops with Retina displays do not have ethernet connections, however. To connect these machines, you would need an adapter that will connect to the USB or Thunderbolt (preferred) port.